What is in this article ?
Install rabbitMQ server
Connecting to a broker
Producing messages
Consuming messages
Broadcasting messages
Guaranteeing message processing
Distributing messages to many consumers
Using message properties
Messaging with transactions
Handling unroutable messages
Install rabbitMQ server on centos7
You can see a download list here
https://www.rabbitmq.com/install-rpm.html#downloads
Some basic step to install can be as describe below
echo "1. We can install EPEL using yum:"
sudo yum install epel-release -y

echo "Step 2: Install Erlang"
cd ~
wget http://packages.erlang-solutions.com/erlang-solutions-1.0-1.noarch.rpm
sudo rpm -Uvh erlang-solutions-1.0-1.noarch.rpm
sudo yum install erlang

echo "Verify your installation of Erlang with command: erl"

#erl

echo "Step 3: Install RabbitMQ"
cd ~
#download
#https://www.rabbitmq.com/install-rpm.html#downloads
echo "Download"
wget https://github.com/rabbitmq/rabbitmq-server/releases/download/v3.8.16/rabbitmq-server-3.8.16-1.el7.noarch.rpm
echo "Signature"
sudo rpm --import https://github.com/rabbitmq/rabbitmq-server/releases/download/v3.8.16/rabbitmq-server-3.8.16-1.el7.noarch.rpm.asc
echo "Install"
sudo yum install rabbitmq-server-3.8.16-1.el7.noarch.rpm

echo "Step 4: Modify firewall rules"
sudo firewall-cmd --zone=public --permanent --add-port=4369/tcp --add-port=25672/tcp --add-port=5671-5672/tcp --add-port=15672/tcp  --add-port=61613-61614/tcp --add-port=1883/tcp --add-port=8883/tcp
sudo firewall-cmd --reload


echo "5. Enable the rabbitmq-server service on boot"
sudo systemctl start rabbitmq-server.service
sudo systemctl enable rabbitmq-server.service

echo "6. Check the service"
sudo rabbitmqctl status
For futher access, create an account
echo "Step 7: Enable and use the RabbitMQ management console"
sudo rabbitmq-plugins enable rabbitmq_management
sudo chown -R rabbitmq:rabbitmq /var/lib/rabbitmq/

echo "Step 8: add user mqadmin with pass password  and set_user_tags as administrator"
sudo rabbitmqctl add_user mqadmin password
sudo rabbitmqctl set_user_tags mqadmin administrator

sudo rabbitmqctl set_permissions -p / mqadmin ".*" ".*" ".*"
echo "List user for more info"
rabbitmqctl list_users
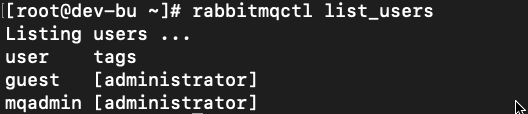
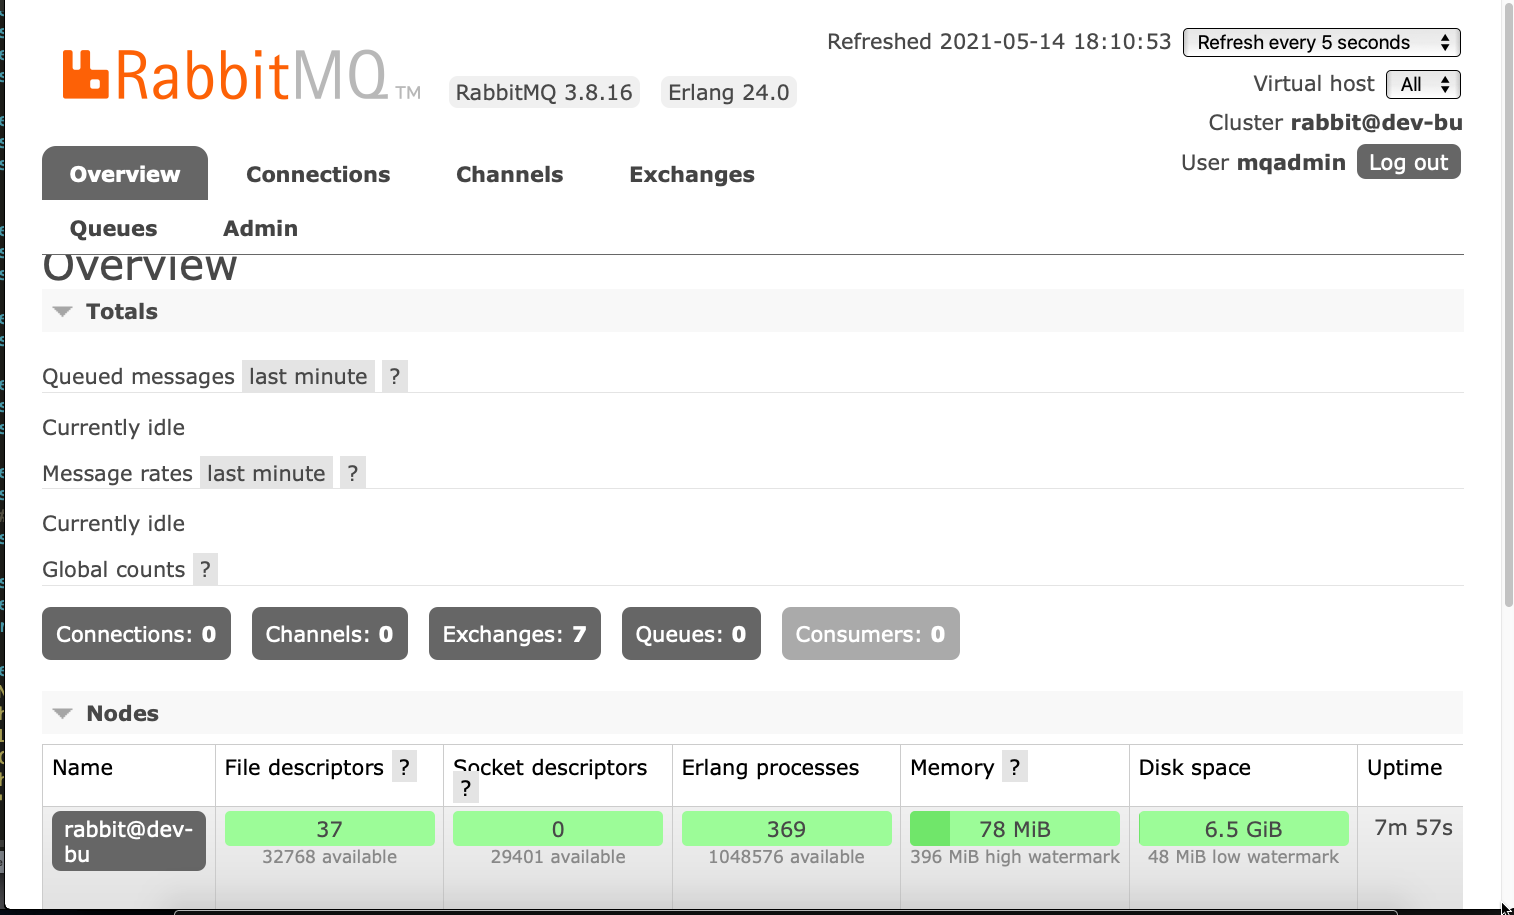
And now, login to your rabbitMQ admin page
http://[your-vultr-server-IP]:15672/
It will be like this
Connecting to a broker
Every application that uses AMQP needs to establish a connection with the AMQP broker. By default, RabbitMQ (as well as any other AMQP broker up to version 1.0) works over TCP as a reliable transport protocol on port 5672, that is, the IANA-assigned port.
In order to create a Java client that connects to the RabbitMQ broker, you need to perform the following steps:
Below is the example code wrote in java
1. Import the needed classes from the Java RabbitMQ client library in the program namespace:
import com.rabbitmq.client.Channel;
import com.rabbitmq.client.Connection;
import com.rabbitmq.client.ConnectionFactory;
2. Create an instance of the client ConnectionFactory:
ConnectionFactory factory = new ConnectionFactory();
3. Set the ConnectionFactory options:
factory.setHost(rabbitMQhostname);
4. Connect to the RabbitMQ broker:
Connection connection = factory.newConnection();
5. Create a channel from the freshly created connection:
Channel channel = connection.createChannel();”
6. As soon as we are done with RabbitMQ, release the channel and the connection:
channel.close();
connection.close();
Producing messages
After connecting to the broker, as seen in the previous recipe, you can start sending messages performing the following steps:
1.Declare the queue, calling the queueDeclare() method on com.rabbitmq.client.Channel:
String myQueue = "myFirstQueue";
channel.queueDeclare(myQueue, true, false, false, null);
2. Send the very first message to the RabbitMQ broker:
String message = "My message to myFirstQueue";
channel.basicPublish("",myQueue, null, message.getBytes());
S3. end the second message with different options:
channel.basicPublish("",myQueue,MessageProperties.PERSISTENT_TEXT_PLAIN,message.getBytes());
Notes:
To check the rabbitMQ status on the server, use this command
sudo rabbitmqctl status
Consuming messages
In order to consume the messages sent, perform the following steps:
1. Declare the queue where we want to consume the messages from:
String myQueue="myFirstQueue";
channel.queueDeclare(myQueue,true, false, false, null);
2. Define a specialized consumer class inherited from DefaultConsumer:
public class ActualConsumer extends DefaultConsumer {
  public ActualConsumer(Channel channel) {
    super(channel);
  }
  @Override
  public void handleDelivery(
    String consumerTag,
    Envelope envelope,
    BasicProperties properties,
    byte[] body) throws java.io.IOException {
      String message = new String(body);
      System.out.println("Received: " + message);
    }
}
3. Create a consumer object, which is an instance of this class, bound to our channel:
ActualConsumer consumer = new ActualConsumer(channel);
4. Start consuming messages:
String consumerTag = channel.basicConsume(myQueue, true, consumer);
5. Once done, stop the consumer:
channel.basicCancel(consumerTag);
We are now ready to mix all together, to see the recipe in action:
Start one instance of the Java producer; messages start getting published immediately.
Start one or more instances of the Java/Python/Ruby consumer; the consumers receive only the messages sent while they are running.
Stop one of the consumers while the producer is running, and then restart it; we can see that the consumer has lost the messages sent while it was down.
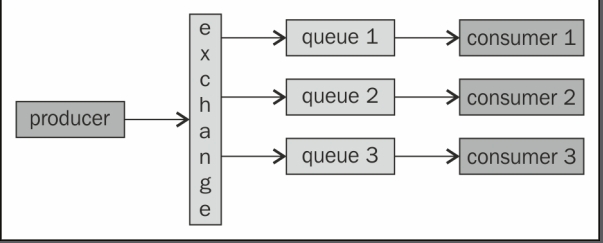
Here is the diagram of what is happening
Using body serialization with JSON
Using RPC with messaging
Broadcasting messages
In this example, we are preparing four different codes to broadcast a message to many different consumer:
The Java publisher
The Java consumer
The Python consumer
The Ruby consumer
1. Declare a fanout exchange:
channel.exchangeDeclare(myExchange,“fanout");
2. Send one message to the exchange:
channel.basicPublish(myExchange, "", null, jsonmessage.getBytes());
Then to prepare a Java consumer:
1. Declare the same fanout exchange declared by the producer:
channel.exchangeDeclare(myExchange, "fanout");
2. Autocreate a new temporary queue:
String queueName = channel.queueDeclare().getQueue();
3. Bind the queue to the exchange:
channel.queueBind(queueName, myExchange, "");
4. Define a custom, non-blocking consumer, as already seen in the Consuming messages recipe.
Consume messages invoking channel.basicConsume()
Guaranteeing message processing
A message is stored in a queue until one consumer gets the message and sends the ack back to the broker.
The ack can be either implicit or explicit. In the previous examples we have used theimplicit ack.
In order to guarantee that the messages have been acknowledged by the consumer after processing them, you can perform the following steps:
Declare a queue:
channel.queueDeclare(myQueue, true, false, false,null);
Bind the consumer to the queue, specifying false for the autoAck parameter of basicConsume():
ActualConsumer consumer = new ActualConsumer(channel);
boolean autoAck = false; // n.b.
channel.basicConsume(MyQueue, autoAck,consumer);
Consume a message and send the ack:
public void handleDelivery(String consumerTag,Envelope envelope, BasicPropertiesproperties,byte[] body) throws java.io.IOException {
String message = new String(body);
this.getChannel().basicAck(envelope.getDeliveryTag(),false);
Distributing messages to many consumers
Using message properties
Messaging with transactions
Handling unroutable messages
Use rabbitMQ
Additional information: RabbitMQ vs MQTT Comparison
RabbitMQ vs MQTT Comparison Table
Let’s discuss the top comparison between RabbitMQ vs MQTT:
| RabbitMQ | MQTT |
| Designed as a general-purpose messaging protocol that can be used for message-oriented middleware and for peer-to-peer data transfer. It has been adopted by many big companies/organizations like JP Morgan, NASA (for Nebula Cloud Computing) and Google. In fact, it also finds usage in India’s Aadhar Project, which is the largest biometric database in the world. | Designed for IOT devices. Ideal for remote low power devices sending messages over a bandwidth-constrained network. In fact, Facebook uses it because it draws lesser power and is lighter on the bandwidth. |
| It supports powerful message routing. It is useful when we need to run the same job on a specific server, group of servers or all servers. The application sends one message, and exchange will route it. | It doesn’t support complex message routing. |
| Not wire-efficient and requires more effort for implementing on a client. In order to publish messages to a node, the first step is to establish a link, then enable flow over that link and finally send the messages. | It is wire-efficient, and the efforts for implementing on a client are lesser. |
| It supports both points to point and pub-sub messaging techniques. | It supports only the pub-sub messaging technique. It doesn’t support message queues. |
| It implements SASL mechanisms, thereby enabling users to choose the security they want to (E.g. Kerberos v5) without changing the protocol. It also supports proxy security servers, therefore allowing organizations to use nested firewalls, gatekeepers, etc. | In terms of user security, it allows short passwords and usernames that don’t provide enough security in the modern world. In case of any policy change or security weakness, it would require a new version of the protocol. |
| It doesn’t support LVQs out of the box. | It supports Last-Value-Queues (LVQs), which allows a new Consumer to skip previous messages, get the latest ones and then receive updates on the same. A typical use case would be stock prices, where one would be interested in the latest values. |
| It can have multiple message namespaces, and each of them supports different ways of finding messages. | Its only message namespace is a topic, and all messages will go into it. |
Conclusion
Both RabbitMQ and MQTT are popular and widely used in the industry. You would prefer RabbitMQ when there is a requirement for complex routing, but you would prefer MQTT if you are building an IOT application. For larger systems, you would probably use a combination of the two so that you can utilize the benefits of both.
## Keyword
AMQP: Advanced Message Queuing Protocol
### Reference
https://www.cloudamqp.com/blog/part1-rabbitmq-for-beginners-what-is-rabbitmq.html
https://www.rabbitmq.com/install-rpm.html#downloads
https://github.com/rabbitinaction/sourcecode
Bài viết khác
Use AWS to deploy your applications and services
Amazon Web Services (AWS) is a cloud computing platform that provides a wide range of services to help businesses and individuals build and deploy applications in the cloud. AWS offers a variety of services such as compute, storage, databases, networking, security, and more. In this guide, we will walk through the steps to get started […]

Use docker to run go project
Docker is a powerful tool that enables developers to create, deploy and run applications in a containerized environment. Using Docker to run Go projects has many advantages, including the ability to isolate your application from the underlying operating system, simplifying the deployment process, and allowing for greater scalability and flexibility. In this guide, we will […]
Install WSL for windows 10
1/ Enable feature Windows Subsystem for Linux Head to Control Panel > Programs > Turn Windows Features On Or Off. Enable the “Windows Subsystem for Linux” option in the list, and then click the “OK” button. Restart computer Now you can type on console: wsl –help 2/ Download ubuntu 18 from Microsoft Store or open […]
Make a binary file or script file run on startup on ubuntu
To make a binary file run on boot, you can create a startup script that will run the binary file when the operating system starts. The exact process for creating a startup script depends on the operating system you’re using. Here’s an example for a Linux operating system using the systemd init system: Create a […]

Explicit ssl bumping with Squid
To perform explicit SSL bumping with Squid, you need to perform the following steps: Generate a SSL certificate and key: You can either generate a self-signed certificate or obtain one from a certificate authority. The certificate and key will be used by Squid to encrypt and decrypt the traffic. Install and configure Squid: Squid is […]

Explicit ssl bumping with HAProxy
Basic guide About Explicit SSL bumping Explicit SSL bumping also known as “SSL interception,” is a feature of some reverse proxies and security appliances that allows the proxy to decrypt, inspect, and re-encrypt SSL/TLS encrypted traffic. The proxy acts as a man-in-the-middle, decrypting incoming SSL/TLS traffic and re-encrypting it before forwarding it to the destination […]

 Khoá học lập trình game con rắn cho trẻ em